New on our site
April 2014
Added WiSpehrT° (WiFi thermometer) section
WiSpher RS
January 2013
The first device of the WiSpher series - WiSpher RS - is ready and tested.
WiSpher T°
March 2013
The WiSpehrT° - the WiFi thermometer project has been started
November 2013
First WiSpehrT° WLAN temperature sensors samples available
January 2014
You can see real time data uploaded by our WiSpehrT° WiFi temperature sensor there...
April 2014
Beta tests of WiSpherT° Android application for WiFi thermometer are almost done.
June 2014
You can already order WiSpherT° WiFi thermometer in our shop.
July 2014
WiSpherT° Android app available in Google Play.
Wispher Apps
Check our mobile applications at
WiSpherT° Configuration Guide
This guide describes how to configure WiSpherT° WLAN thermometer and connect it to selected WiFi network.
Requirements
To configure WiSpherT° sensor you need:- PC with at least Windows XP operating system with installed .NET framework at least in version 3.5
- Smartphone or tablet with installed WiSpherT° application
- USB cable for connecting WiSpherT° sensor to PC
- Password or security key for WiFi network to which the sensor shall connect
Configuration procedure
- Check if your smartphone or tablet is connected to the same WiFi as the sensor will be connected to
Start the WiSpherT° application and select Sensors List option. - Download WiSpherT° Configuration Tool archive
- Unpack the WiSpherTCfg.zip into any directory on your hard drive
- Connect WiSpherT° sensor to any USB port in your PC. The sensor will be available as normal COM port.
Drivers needed for installation are included in your operating system. In case you would have any problems
with driver, you can download latest version here
- Start the WiSpherTCfg.exe program and wait until it finds the sensor connected to your PC.
 The green LED in the sensor starts blinking fast.
 - Wait until the sensors scans available WiFi networks
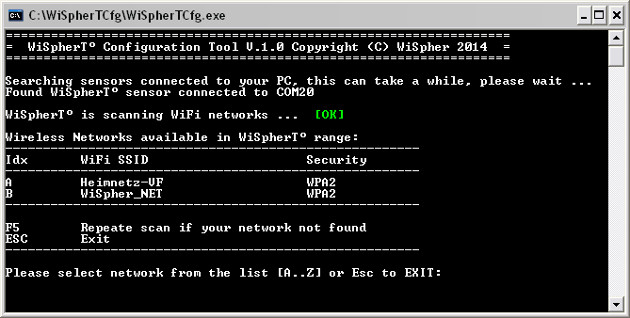
- Select your WiFi network from the list by pressing corresponding letter. In case your WiFi network is not present on the list, please
check if it's configured as visible and press F5 to repeat scanning. ATTENTION: It's possible in very sporadic cases that the
sensor will not show your network during first scan due to concurrent scanning and re-connection trial operations. In that case please
restart scanning by pressing F5
- Enter and confirm your WiFI access password or key, wait until your settings are stored and
sensor has connected to your WLAN:
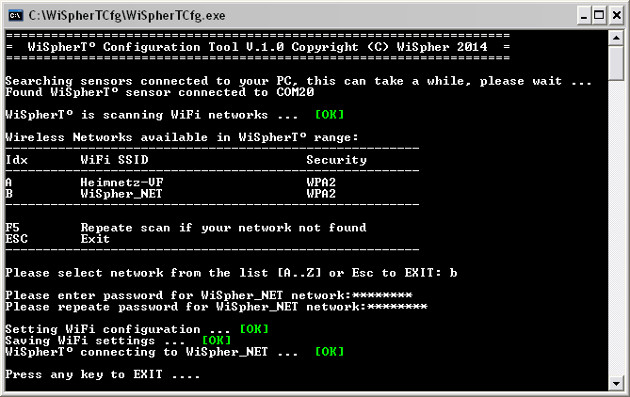 The green LED in the sensor will slowly blink for 7 seconds and sensor will switch off.
- You should be able to see the sensor in the Sensors List on your smartphone or tablet. Select the sensor and enter name and update period for it.